[태그:] performance testing

  • 실패 없는 플랫폼 출시를 위한 필수 관문: 성능 테스트 완벽 정복 (정보처리기사 핵심 실무)

    실패 없는 플랫폼 출시를 위한 필수 관문: 성능 테스트 완벽 정복 (정보처리기사 핵심 실무)

    안녕하세요, 정보처리기사 자격증이라는 중요한 목표를 향해 매진하고 계신 개발자 여러분! 그리고 사용자의 기대를 뛰어넘는 고품질 서비스를 만들기 위해 노력하는 모든 분들. 우리가 심혈을 기울여 개발한 플랫폼이 실제 사용자들을 만났을 때, 과연 예상했던 대로 빠르고 안정적으로 작동할까요? 수많은 사용자가 동시에 몰려도 견뎌낼 수 있을까요? 이러한 질문에 대한 답을 찾고, 실패 없는 서비스 출시와 운영을 보장하기 위한 핵심 활동이 바로 ‘성능 테스트(Performance Testing)’입니다. 성능 테스트는 단순히 ‘하면 좋은 것’이 아니라, 특히 사용자 경험과 시스템 안정성이 중요한 오늘날(2025년 현재)의 디지털 환경에서 ‘반드시 해야 하는’ 필수적인 품질 보증 활동입니다. 앞서 다룬 성능 특성 분석의 연장선에서, 이번 글에서는 성능 테스트의 정의와 중요성, 다양한 유형, 체계적인 수행 프로세스, 주요 도구, 그리고 개발자로서 어떻게 기여해야 하는지까지, 정보처리기사 시험과 실무에 필요한 모든 것을 상세하게 다루겠습니다.

    성능 테스트, 왜 반드시 해야 할까? 그 중요성 재확인

    성능 테스트는 시스템이 특정 워크로드(Workload) 하에서 요구되는 성능 목표(응답 시간, 처리량, 안정성 등)를 만족하는지 확인하고 평가하는 비기능 테스트(Non-functional Testing)의 한 유형입니다. 단순히 기능이 ‘동작하는지(Does it work?)’를 검증하는 기능 테스트와 달리, 성능 테스트는 ‘얼마나 잘 동작하는지(How well does it work?)’에 초점을 맞춥니다.

    성능 테스트의 정의와 핵심 목적

    성능 테스트의 주된 목적은 다음과 같습니다.

    • 성능 검증: 시스템이 사전에 정의된 성능 요구사항(예: 응답 시간 목표, 처리량 목표)을 충족하는지 확인합니다.
    • 병목 식별: 시스템의 성능을 저하시키는 원인(Bottleneck)을 찾아냅니다. (예: 느린 DB 쿼리, 비효율적인 코드, 부족한 하드웨어 자원)
    • 용량 산정 (Capacity Planning): 시스템이 최대로 처리할 수 있는 사용자 수나 트랜잭션 양을 파악하여 향후 자원 증설 계획의 기초 자료로 활용합니다.
    • 안정성 확인: 높은 부하 또는 장시간 운영 조건에서도 시스템이 안정적으로 동작하는지, 오류 발생 시 정상적으로 복구되는지 등을 검증합니다.
    • 튜닝 효과 검증: 성능 개선 작업(코드 최적화, 인프라 변경 등) 후 실제로 성능이 향상되었는지 확인합니다.
    • 회귀 테스트: 코드 변경 후 이전에 발생하지 않았던 성능 문제가 새로 생기지는 않았는지(Performance Regression) 확인합니다.

    성능 테스트의 중요성:不做 안하면 정말 큰일 나는 이유

    개발 막바지에 몰아서 하거나, 심지어 생략하는 경우도 있지만, 성능 테스트를 소홀히 했을 때의 대가는 매우 클 수 있습니다.

    • 치명적인 사용자 경험 저하: 출시 후 예기치 못한 성능 문제(느린 속도, 잦은 오류)는 사용자의 불만과 대규모 이탈로 이어져 비즈니스에 심각한 타격을 줄 수 있습니다.
    • 예상치 못한 운영 비용 증가: 성능 병목을 미리 해결하지 못하면, 문제 해결을 위해 더 많은 하드웨어 자원을 투입해야 하거나(비용 증가), 문제 해결에 더 많은 시간과 노력이 소요될 수 있습니다.
    • 시스템 장애 및 서비스 중단: 특정 임계점을 넘어서는 부하가 발생했을 때 시스템이 다운되거나 서비스가 중단될 위험이 있습니다. 특히 대규모 이벤트나 마케팅 캠페인 시 치명적일 수 있습니다.
    • 브랜드 신뢰도 하락: 잦은 성능 문제나 시스템 장애는 사용자의 신뢰를 잃게 하고 브랜드 이미지에 부정적인 영향을 미칩니다.
    • SLA/SLO 위반: 서비스 수준 협약(SLA)이나 서비스 수준 목표(SLO)에서 정의한 성능 기준을 만족하지 못할 경우, 계약 위반이나 패널티로 이어질 수 있습니다.

    따라서 성능 테스트는 개발 라이프사이클 초기에 계획되고, 꾸준히 실행되어야 하는 필수적인 활동입니다. 특히 PO나 데이터 분석가는 성능 테스트 결과를 통해 서비스의 안정성과 사용자 경험 수준을 가늠하고 비즈니스 의사결정에 활용할 수 있습니다.


    성능 테스트의 종류: 무엇을, 어떻게 알고 싶은가?

    성능 테스트는 측정하고자 하는 목표와 방식에 따라 여러 종류로 나뉩니다. 각 테스트 유형의 목적과 특징을 이해하고 상황에 맞게 선택하여 적용하는 것이 중요합니다.

    1. 부하 테스트 (Load Testing): “평소 실력은 괜찮은가?”

    • 목표: 시스템이 예상되는 정상적인 최대 부하 조건 하에서 안정적으로 동작하며 요구되는 성능 지표(응답 시간, 처리량 등)를 만족하는지 확인합니다.
    • 방법: 가상 사용자(Virtual User) 수를 점진적으로 증가시켜 예상되는 피크 타임(Peak time)의 부하 수준까지 도달시킨 후, 일정 시간 동안 유지하며 시스템의 반응을 측정합니다.
    • 주요 확인 사항: 목표 응답 시간 및 처리량 달성 여부, 자원 사용률의 안정적인 유지 여부. 평상시 운영 환경에서의 성능을 예측하는 데 사용됩니다.

    2. 스트레스 테스트 (Stress Testing): “한계는 어디까지인가?”

    • 목표: 시스템이 감당할 수 있는 최대 부하 임계점을 찾고, 한계를 초과했을 때 시스템이 어떻게 반응하는지(예: 성능 저하, 오류 발생, 시스템 다운) 확인합니다. 시스템의 병목 지점을 찾아내는 데 매우 효과적입니다.
    • 방법: 가상 사용자 수나 요청 빈도를 예상 최대 부하 이상으로 점진적 또는 급격히 증가시켜 시스템이 더 이상 정상적으로 처리하지 못하는 지점(Breaking Point)까지 밀어붙입니다.
    • 주요 확인 사항: 시스템 장애 발생 지점, 장애 발생 시 정상적인 오류 처리 및 복구 능력, 병목이 되는 특정 자원(CPU, 메모리, DB 등) 식별.

    3. 스파이크 테스트 (Spike Testing): “갑작스러운 공격에도 버틸 수 있는가?”

    • 목표: 갑작스럽고 짧은 시간 동안 폭증하는 부하에 대해 시스템이 어떻게 반응하고 얼마나 빨리 안정 상태로 복구되는지 평가합니다.
    • 방법: 평상시 부하 상태에서 순간적으로 매우 높은 부하(예: 평소의 5~10배)를 짧은 시간 동안 가한 후, 다시 정상 부하로 돌아왔을 때 시스템의 응답 시간, 처리량, 에러율 변화 및 회복 시간을 측정합니다.
    • 주요 확인 사항: 부하 급증 시 시스템 다운 여부, 성능 저하 정도, 부하 해소 후 정상 상태 복구 시간. 티켓 예매 오픈, 블랙 프라이데이 세일 등 예측 가능한 부하 급증 상황 대비에 유용합니다.

    4. 내구성 테스트 (Soak / Endurance Testing): “오래 달려도 지치지 않는가?”

    • 목표: 장시간 동안(수 시간 ~ 수일) 지속되는 부하 상태에서 시스템의 안정성과 성능 유지 능력을 검증합니다. 시간이 지남에 따라 발생하는 문제를 찾아내는 데 중점을 둡니다.
    • 방법: 예상되는 평균적인 부하 수준을 장시간 동안 꾸준히 가하면서 시스템의 응답 시간 변화, 자원 사용률(특히 메모리) 변화, 에러 발생 추이 등을 모니터링합니다.
    • 주요 확인 사항: 메모리 누수(Memory Leak), 데이터베이스 커넥션 누수, 시스템 리소스 고갈, 장시간 운영 시 성능 저하 여부 등.

    5. 용량 테스트 (Capacity Testing): “몇 명까지 수용 가능한가?”

    • 목표: 시스템이 성능 목표(예: 특정 응답 시간 기준)를 만족하면서 처리할 수 있는 최대 사용자 수 또는 트랜잭션 처리량을 결정합니다.
    • 방법: 부하를 점진적으로 증가시키면서 성능 지표를 측정하고, 정의된 성능 목표를 만족하는 최대 부하 지점을 찾습니다. 스트레스 테스트와 유사하지만, 시스템 장애 지점이 아닌 ‘성능 목표 만족 한계점’을 찾는 데 더 초점을 둡니다.
    • 주요 확인 사항: 목표 성능 기준 하에서의 최대 처리 능력. 향후 시스템 확장 계획이나 SLA 설정의 기준이 됩니다.

    6. 확장성 테스트 (Scalability Testing): “성장에 얼마나 잘 대비되어 있는가?”

    • 목표: 시스템의 부하 처리 능력을 향상시키기 위해 자원(하드웨어 또는 소프트웨어 설정)을 추가하거나 변경했을 때, 성능이 얼마나 효과적으로 개선되는지 측정하고 평가합니다.
    • 방법: 다양한 부하 수준에서 자원(예: CPU 코어 수, 메모리 크기, 서버 인스턴스 수)을 변경해가며 성능 테스트를 반복 수행하고, 자원 증가량 대비 성능 향상 정도를 분석합니다. 수직 확장(Scale-up)과 수평 확장(Scale-out) 전략의 효과를 검증하는 데 사용됩니다.
    • 주요 확인 사항: 자원 추가 시 선형적인 성능 향상 여부, 특정 자원 추가 시 예상되는 성능 개선 효과 예측.

    이러한 다양한 유형의 성능 테스트를 프로젝트의 특성과 목표에 맞게 조합하여 수행함으로써, 시스템의 성능을 다각적으로 검증하고 잠재적인 위험을 최소화할 수 있습니다.


    성능 테스트 수행 프로세스: 성공적인 테스트를 위한 체계적인 접근법

    효과적인 성능 테스트는 즉흥적으로 수행되는 것이 아니라, 명확한 목표 설정부터 결과 분석 및 개선까지 체계적인 프로세스를 따라야 합니다.

    1단계: 환경 준비 및 목표 설정

    • 테스트 환경 식별 및 구축: 실제 운영 환경과 최대한 유사한 별도의 테스트 환경을 준비합니다. 하드웨어 사양, 네트워크 구성, 데이터베이스, 소프트웨어 버전 등을 일치시키는 것이 중요합니다. 완벽히 동일한 환경 구축이 어렵다면, 차이점을 명확히 인지하고 결과 해석 시 고려해야 합니다.
    • 성능 목표/기준 정의 (Acceptance Criteria): 테스트를 통해 달성하고자 하는 구체적이고 측정 가능한 성능 목표를 설정합니다. (예: “상품 상세 페이지의 95th percentile 응답 시간은 500ms 미만이어야 한다”, “피크 타임 시 1,000 TPS를 처리할 수 있어야 한다”, “CPU 사용률은 70%를 넘지 않아야 한다”) 이는 비즈니스 요구사항, SLA, 이전 버전의 성능 등을 기반으로 정의됩니다.

    2단계: 시나리오 설계 및 스크립트 개발

    • 주요 비즈니스 시나리오 식별: 사용자가 시스템에서 수행하는 핵심적인 작업 흐름(예: 로그인, 상품 검색, 장바구니 담기, 주문 결제)을 파악하고 테스트 대상으로 선정합니다. 실제 사용자 행동 패턴을 반영하는 것이 중요합니다. (로그 분석 데이터 활용 가능)
    • 워크로드 모델링: 실제 운영 환경에서의 사용자 행동 패턴(예: 각 시나리오의 비율, 사용자별 평균 작업 시간, 동시 사용자 수 분포)을 분석하여 테스트 시뮬레이션에 반영할 워크로드 모델을 정의합니다.
    • 테스트 스크립트 작성: 성능 테스트 도구(JMeter, K6 등)를 사용하여 식별된 시나리오를 자동화하는 스크립트를 작성합니다. 이 과정에서 파라미터화(Parameterization) – 각 가상 사용자가 다른 데이터(예: 다른 ID/PW, 다른 검색어)를 사용하도록 설정 – 와 상관관계(Correlation) – 서버가 동적으로 생성하는 값(예: 세션 ID)을 스크립트에서 추출하여 후속 요청에 사용하는 것 – 처리가 중요한 기술적 과제입니다.

    3단계: 테스트 데이터 준비 및 환경 구성

    • 테스트 데이터 생성/확보: 스크립트에서 사용할 대량의 테스트 데이터를 준비합니다. 실제 데이터와 유사한 분포와 크기를 가지는 것이 중요하며, 개인정보 등 민감 정보는 마스킹 처리해야 합니다.
    • 테스트 환경 검증: 테스트 시작 전에 테스트 환경(애플리케이션 서버, 데이터베이스, 네트워크 등)이 정상적으로 구성되었고, 테스트 데이터가 올바르게 로드되었는지 확인합니다.

    4단계: 테스트 실행 및 모니터링

    • 테스트 실행 계획: 어떤 종류의 테스트(부하, 스트레스 등)를 어떤 순서로, 어떤 부하 프로파일(예: 점진적 증가, 일정 시간 유지)로 실행할지 구체적인 계획을 수립합니다.
    • 테스트 수행: 계획에 따라 성능 테스트 도구를 사용하여 부하를 발생시킵니다.
    • 동시 모니터링: 테스트가 진행되는 동안 대상 시스템의 주요 성능 지표(응답 시간, 처리량, 에러율, 서버 자원 사용률, DB 상태 등)를 모니터링 도구(APM, 시스템 모니터링 툴)를 통해 실시간으로 관찰하고 기록합니다.

    5단계: 결과 분석 및 병목 식별

    • 데이터 수집 및 취합: 성능 테스트 도구와 모니터링 도구에서 수집된 모든 데이터를 취합하고 정리합니다.
    • 결과 분석: 측정된 성능 지표를 사전에 정의된 목표/기준과 비교합니다. 응답 시간 분포, 처리량 변화 추이, 에러 발생 패턴, 자원 사용률 등을 그래프 등으로 시각화하여 분석합니다.
    • 병목 지점 식별: 성능 목표를 만족하지 못하거나 비정상적인 패턴을 보이는 지표의 근본 원인, 즉 병목 지점을 찾아냅니다. (예: 특정 구간의 응답 시간 급증, 특정 서버의 CPU 사용률 포화, 특정 DB 쿼리의 과도한 실행 시간 등) APM 도구의 상세 트랜잭션 분석이나 서버 로그 분석, 프로파일링 등이 활용될 수 있습니다.

    6단계: 튜닝, 보고 및 재테스트

    • 성능 튜닝: 식별된 병목 지점을 해결하기 위해 코드 수정, 쿼리 튜닝, 인프라 설정 변경, 자원 증설 등의 최적화 작업을 수행합니다.
    • 결과 보고: 테스트 목표, 수행 과정, 결과 요약, 분석 내용, 발견된 병목 현상, 개선 권고 사항 등을 포함한 결과 보고서를 작성하여 이해관계자(개발팀, 운영팀, 기획팀 등)와 공유합니다.
    • 재테스트 (Regression Testing): 튜닝 작업 후 동일한 테스트를 다시 수행하여 개선 효과를 검증하고, 다른 부작용(새로운 병목 발생 등)은 없는지 확인합니다. 성능 최적화는 종종 이러한 ‘테스트 → 분석 → 튜닝 → 재테스트’의 반복적인 과정을 거칩니다.

    이러한 체계적인 프로세스를 따르면 성능 테스트의 효과를 극대화하고 신뢰성 있는 결과를 얻을 수 있습니다.


    성능 테스트 도구와 주요 고려사항: 올바른 선택과 현명한 활용

    성능 테스트를 효과적으로 수행하기 위해서는 적절한 도구를 선택하고, 테스트 과정에서 발생할 수 있는 어려움들을 이해하고 대비하는 것이 중요합니다.

    다양한 성능 테스트 도구들

    시중에는 다양한 오픈소스 및 상용 성능 테스트 도구들이 있습니다. 각 도구는 지원하는 프로토콜, 스크립트 작성 방식, 리포팅 기능, 가격 정책 등에서 차이가 있으므로 프로젝트의 요구사항과 예산, 팀의 기술 역량 등을 고려하여 선택해야 합니다.

    • 오픈소스 도구:
      • Apache JMeter: 가장 널리 사용되는 자바 기반의 오픈소스 도구. GUI 기반으로 스크립트 작성이 용이하며 다양한 프로토콜 지원. 플러그인을 통해 기능 확장 가능.
      • K6: JavaScript 기반의 최신 오픈소스 도구. 개발자 친화적인 스크립트 작성 및 CLI 중심 사용. 높은 성능과 효율성 강조.
      • Locust: Python 기반의 오픈소스 도구. 코드를 통해 테스트 시나리오를 정의하며 분산 테스트 지원이 용이.
      • nGrinder: 네이버에서 개발한 오픈소스 플랫폼. JMeter 스크립트 활용 가능하며, 테스트 관리 및 분산 실행 환경 제공.
    • 상용 도구:
      • LoadRunner (Micro Focus): 오랜 역사와 강력한 기능을 가진 대표적인 상용 도구. 다양한 프로토콜 지원 및 상세한 분석 기능 제공. 높은 라이선스 비용.
      • NeoLoad (Tricentis): 사용자 친화적인 인터페이스와 자동화 기능 강조. 최신 웹 기술 지원 우수.
      • WebLOAD (RadView): 엔터프라이즈급 성능 테스트 기능 제공. 클라우드 연동 및 분석 기능 우수.
    • 클라우드 기반 플랫폼:
      • Azure Load Testing, AWS Distributed Load Testing, BlazeMeter (Broadcom), LoadNinja (SmartBear) 등: 클라우드 인프라를 활용하여 대규모 분산 부하 테스트를 쉽게 수행하고 관리할 수 있는 서비스형 플랫폼. 종종 JMeter 등 오픈소스 엔진과 연동됨. 2025년 현재 많은 기업들이 클라우드 기반 테스트 플랫폼 도입을 고려하거나 활용하고 있습니다.

    성능 테스트 수행 시 고려할 점 (Challenges)

    성능 테스트는 생각보다 복잡하고 어려울 수 있습니다. 주요 도전 과제는 다음과 같습니다.

    • 현실적인 시나리오 및 워크로드 모델링: 실제 사용자의 행동과 시스템 사용 패턴을 정확하게 반영하는 시나리오와 워크로드를 설계하는 것이 어렵습니다. 부정확한 모델링은 테스트 결과의 신뢰도를 떨어뜨립니다.
    • 테스트 환경 구축 및 유지보수: 운영 환경과 동일하거나 유사한 테스트 환경을 구축하고 최신 상태로 유지하는 데 많은 비용과 노력이 필요합니다.
    • 복잡한 결과 분석: 대량의 테스트 결과 데이터 속에서 의미 있는 패턴을 찾고 병목의 근본 원인을 정확히 진단하는 것은 경험과 전문성을 요구합니다.
    • 테스트 데이터 관리: 대규모의 현실적인 테스트 데이터를 생성하고 관리하는 것이 복잡하며, 데이터 보안 및 프라이버시 문제도 고려해야 합니다.
    • 스크립트 작성 및 유지보수: 특히 동적인 웹 애플리케이션의 경우, 상관관계 처리나 파라미터화 등으로 인해 스크립트 작성이 복잡해지고, 시스템 변경 시 스크립트 유지보수가 어려울 수 있습니다.
    • 비용: 상용 도구 라이선스 비용, 테스트 환경 구축 및 유지 비용, 대규모 부하 발생을 위한 인프라 비용 등이 발생할 수 있습니다.

    이러한 어려움들을 극복하기 위해서는 명확한 목표 설정, 체계적인 계획 수립, 적절한 도구 선택, 그리고 팀 내외부의 협업과 지속적인 학습이 중요합니다.


    개발자의 시각: 성능 테스트와 개발의 연결고리 강화하기

    성능 테스트는 QA팀이나 별도의 성능 엔지니어만 수행하는 활동이 아닙니다. 개발자는 성능 테스트 라이프사이클 전반에 걸쳐 중요한 역할을 수행하며, 성능 테스트 결과를 통해 더 나은 코드를 작성하고 시스템을 개선하는 데 기여해야 합니다.

    성능 테스트는 개발의 자연스러운 연장선

    • 성능을 고려한 코드 작성 (Performance by Design): 개발 초기부터 성능을 염두에 두고 코드를 작성하는 것이 중요합니다. 비효율적인 알고리즘, 과도한 리소스 사용, 잠재적인 병목 지점을 만들지 않도록 노력해야 합니다.
    • 테스트 용이성 확보: 작성한 코드가 성능 테스트 시나리오에 포함되기 쉽고, 성능 측정이 용이하도록 설계하는 것을 고려해야 합니다. (예: 적절한 로깅, 모니터링을 위한 커스텀 메트릭 노출 등)
    • 요구사항 이해: 개발자는 기능 요구사항뿐만 아니라 성능 요구사항(비기능 요구사항)도 명확히 이해하고 있어야 합니다.

    테스트 결과 분석 및 최적화에 적극 참여

    • 결과 공동 분석: 성능 테스트 결과가 나오면, QA팀이나 성능 엔지니어와 함께 결과를 분석하고 병목의 원인을 파악하는 데 적극적으로 참여해야 합니다. 특히 코드 레벨의 문제로 의심될 경우, 개발자의 역할이 중요합니다.
    • 프로파일링 및 디버깅: 성능 테스트 중 발견된 병목 현상의 원인을 찾기 위해 코드 프로파일링 도구나 디버깅 도구를 활용하여 문제 지점을 정확히 식별합니다.
    • 최적화 방안 제시 및 구현: 식별된 병목을 해결하기 위한 가장 효과적인 코드 수정, 아키텍처 변경, 설정 튜닝 등의 최적화 방안을 제시하고 직접 구현합니다.

    성능 테스트 자동화와 CI/CD 파이프라인 통합

    • Shift-Left Testing: 성능 테스트를 개발 라이프사이클 후반부가 아닌 초기 단계(예: 개발 완료 후 통합 환경)부터 수행하고 자동화하는 ‘Shift-Left’ 접근 방식에 기여합니다.
    • CI/CD 통합: 빌드 및 배포 파이프라인(CI/CD)에 주요 시나리오에 대한 자동화된 성능 테스트를 포함시켜, 코드 변경으로 인한 성능 저하를 조기에 감지하고 방지합니다. (‘성능 테스트 애즈 코드(Performance Testing as Code)’ 개념)
    • 성능 인식 문화 구축: 팀 내에서 성능의 중요성에 대한 인식을 높이고, 성능 테스트 결과를 투명하게 공유하며, 성능 개선을 위한 노력을 지속하는 문화를 만드는 데 기여합니다. DevOps 또는 SRE(Site Reliability Engineering) 팀과의 긴밀한 협력이 중요합니다.

    개발자가 성능 테스트에 대한 이해를 높이고 적극적으로 참여할 때, 개발팀 전체의 성능 역량이 향상되고 더 높은 품질의 제품을 만들 수 있습니다.


    결론: 성능 테스트, 신뢰할 수 있는 플랫폼의 초석

    성능 테스트는 단순히 버그를 찾는 활동을 넘어, 사용자가 만족하고 비즈니스가 성공하는 데 필수적인, 신뢰할 수 있는 플랫폼을 구축하기 위한 핵심적인 과정입니다. 부하, 스트레스, 스파이크, 내구성 등 다양한 유형의 테스트를 통해 시스템의 한계와 능력을 파악하고, 잠재적인 위험을 사전에 제거함으로써 안정적인 서비스 운영의 초석을 다질 수 있습니다.

    정보처리기사 자격증을 준비하는 개발자 여러분에게 성능 테스트에 대한 지식과 실무 경험은 여러분의 기술적 깊이를 더하고 시장 경쟁력을 높이는 중요한 자산이 될 것입니다. 체계적인 프로세스에 따라 성능 테스트를 계획하고 실행하며, 결과를 분석하고 개선하는 능력은 모든 성공적인 개발팀에게 요구되는 핵심 역량입니다.

    성능 문제를 ‘나중에 해결할 문제’로 미루지 마십시오. 성능 테스트를 개발 라이프사이클의 필수적인 부분으로 받아들이고, 개발 초기부터 성능을 고려하며, 테스트 결과를 통해 지속적으로 배우고 개선해나가는 자세가 바로 사용자와 비즈니스 모두에게 사랑받는 플랫폼을 만드는 길입니다.


    #성능테스트 #PerformanceTesting #부하테스트 #LoadTesting #스트레스테스트 #StressTesting #내구성테스트 #SoakTesting #스파이크테스트 #SpikeTesting #용량테스트 #확장성테스트 #JMeter #nGrinder #LoadRunner #K6 #Locust #성능지표 #병목현상 #Bottleneck #정보처리기사 #개발자 #비기능테스트 #NonfunctionalTesting #CICD #성능튜닝

  • Menu – 10 QA

    Menu – 10 QA

    Key Considerations for QA Testing Menus

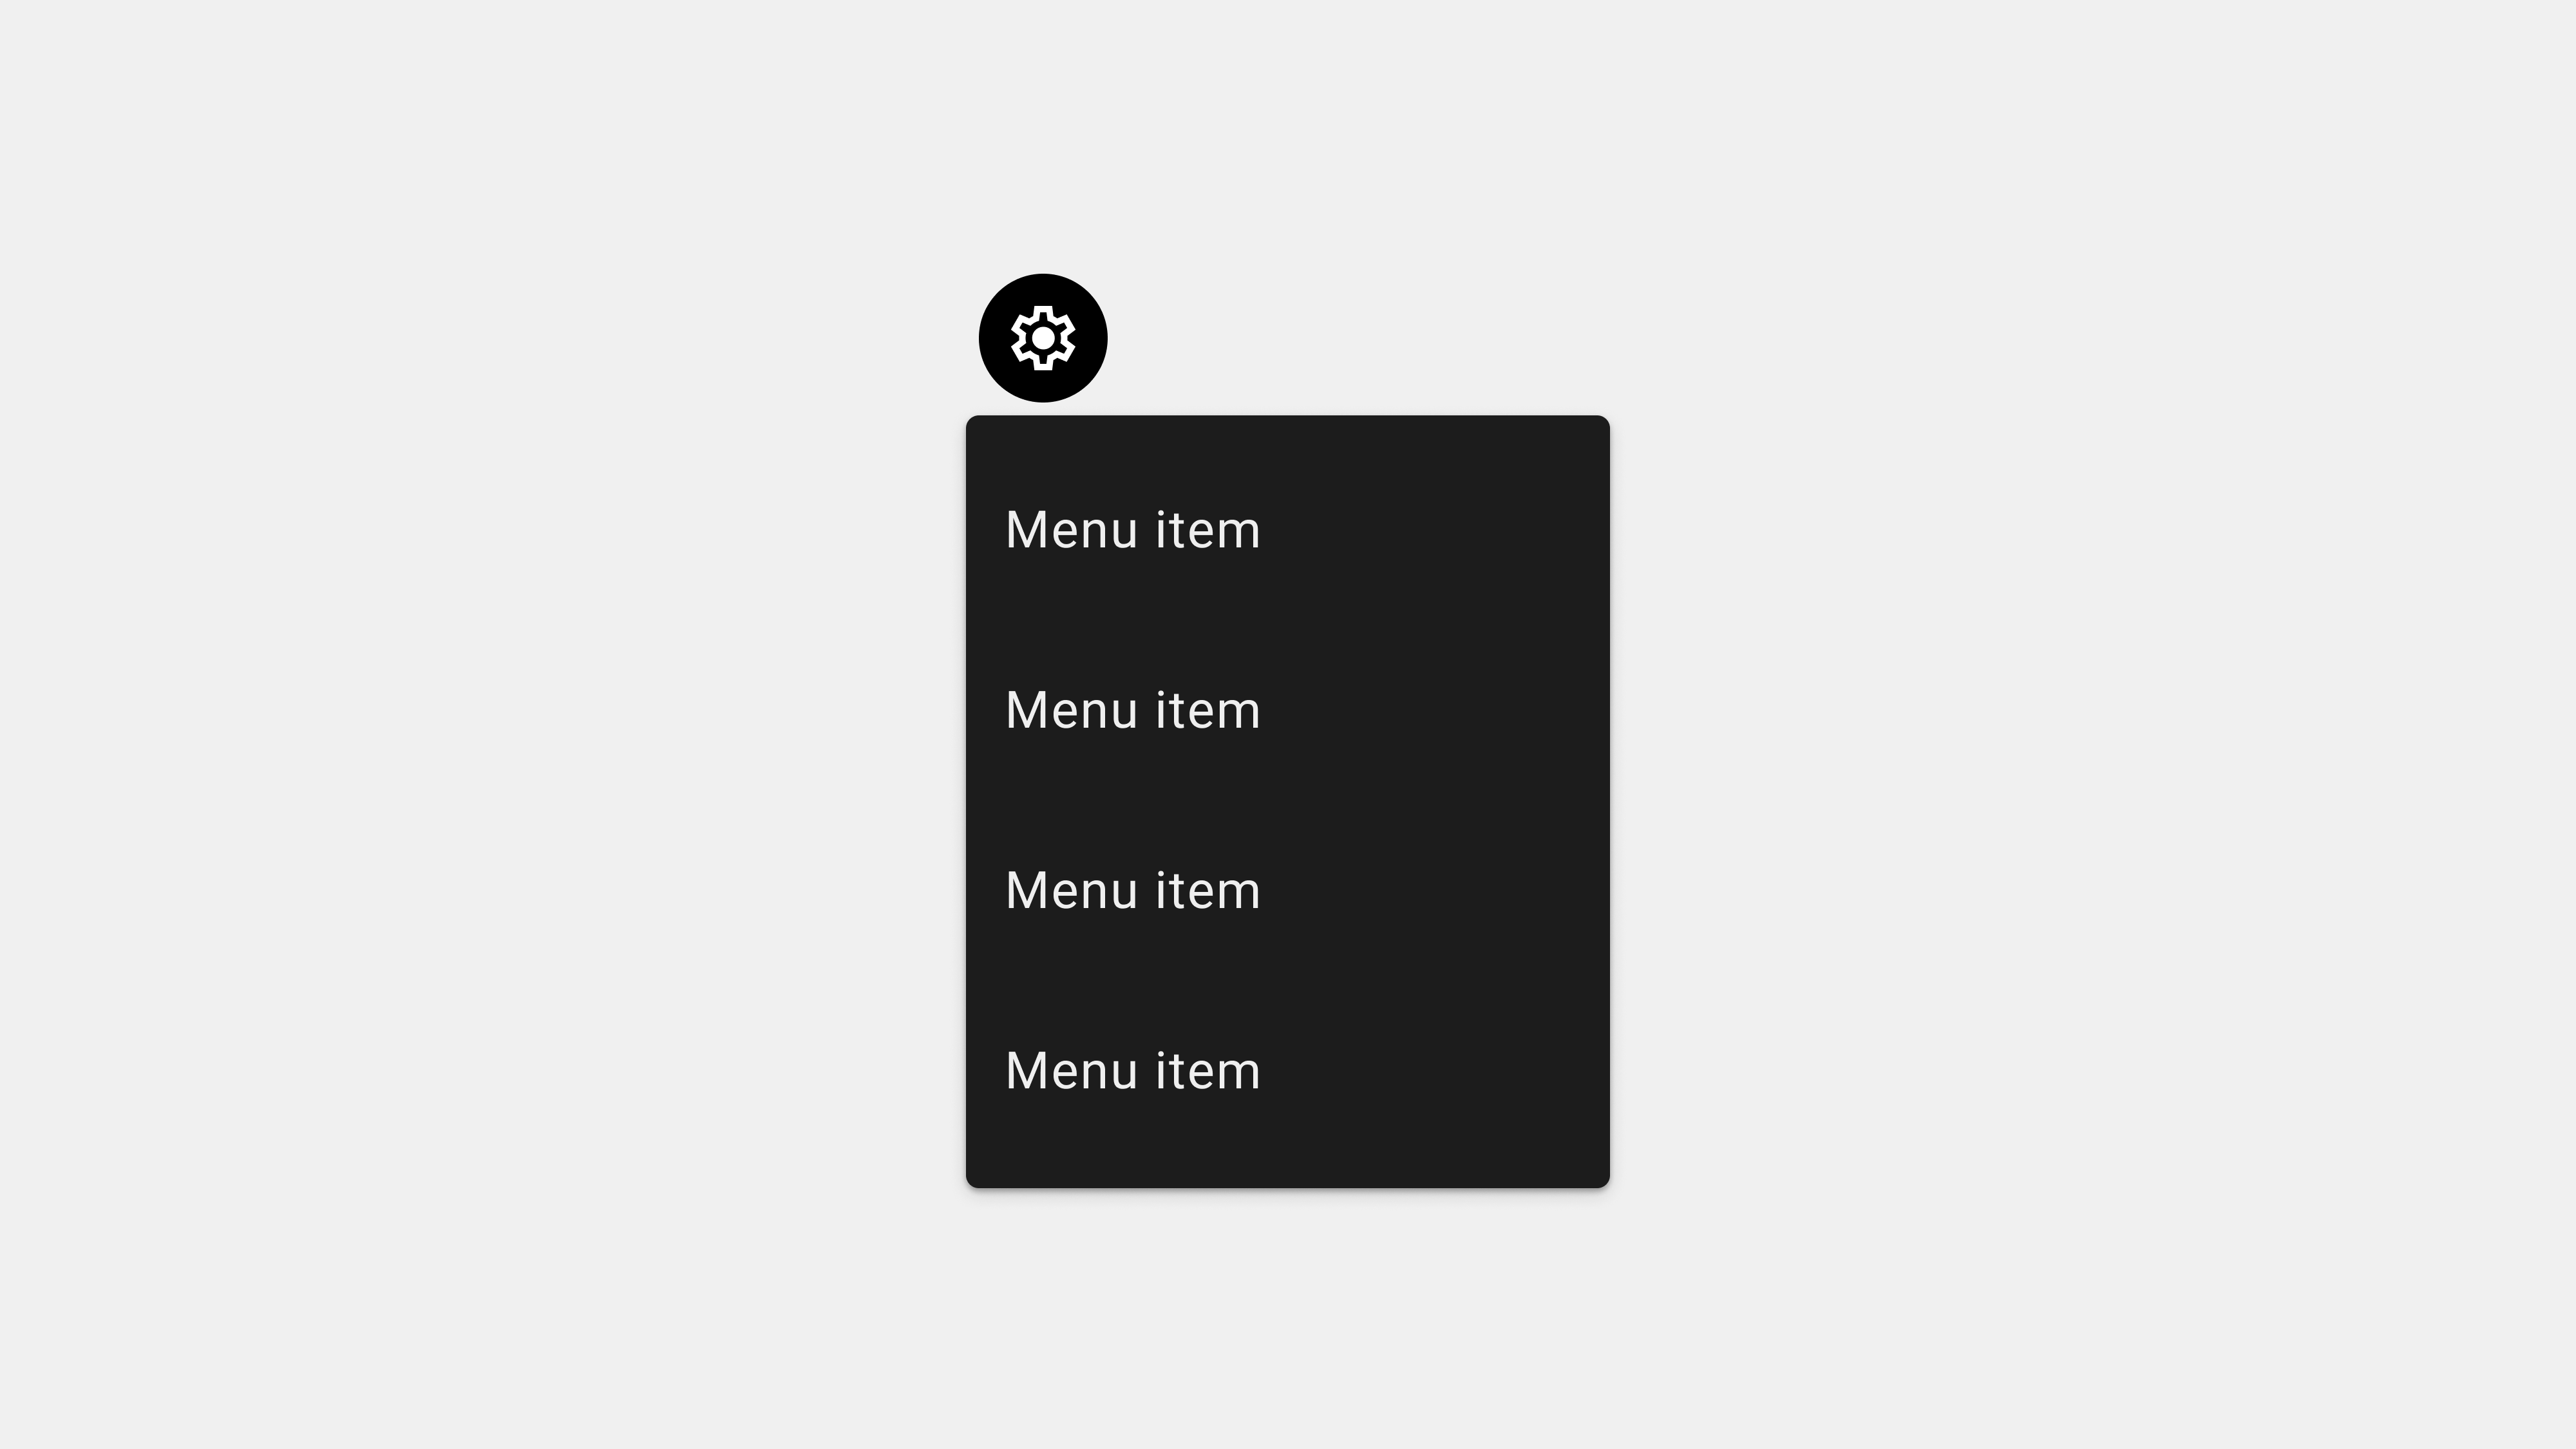
    Menus are a critical component of user interfaces, enabling navigation and task execution. QA testing ensures that menus function as intended, provide a seamless experience, and meet user expectations. This article explores the five most important aspects to focus on during menu QA testing, offering actionable insights for quality assurance specialists.


    1. Functional Testing

    Why It Matters

    Menus must perform their basic functions reliably. Broken links, unresponsive items, or incorrect navigation paths can frustrate users and harm the user experience.

    Key Testing Areas

    • Link Verification: Ensure all menu items route to the correct destination.
    • Dropdown Menus: Test expand/collapse behavior under various conditions.
    • Submenus: Validate that submenus open correctly and are accessible.

    Test Scenarios

    • Clicking each menu item and verifying its destination.
    • Rapidly switching between dropdown menus to ensure they function without errors.
    • Testing submenus with multiple nested layers for proper functionality.

    Tools and Tips

    • Use automated tools like Selenium or Cypress to validate menu links.
    • Conduct manual testing to ensure responsiveness and reliability.
    • Test on various devices and browsers to identify inconsistencies.

    2. Cross-Browser and Cross-Platform Testing

    Why It Matters

    Users access menus on diverse devices and browsers, making it essential to ensure consistent functionality and appearance.

    Key Testing Areas

    • Browser Compatibility: Verify menus function correctly on Chrome, Safari, Firefox, Edge, and more.
    • Device Compatibility: Test menus on desktops, tablets, and smartphones.
    • Operating System Variations: Check for differences across iOS, Android, Windows, and macOS.

    Test Scenarios

    • Verifying the display and behavior of menus on different screen sizes and resolutions.
    • Testing touch interactions (e.g., tap and swipe) on mobile devices.
    • Simulating mouse hover and click interactions on desktop browsers.

    Tools and Tips

    • Use BrowserStack or Sauce Labs for cross-browser and cross-platform testing.
    • Manually test menus on physical devices to identify real-world issues.

    3. Accessibility Testing

    Why It Matters

    Accessible menus ensure inclusivity, enabling users with disabilities to navigate and interact with the interface effectively.

    Key Testing Areas

    • Screen Reader Compatibility: Verify that menu items are correctly announced.
    • Keyboard Navigation: Ensure users can navigate menus using only a keyboard.
    • Focus Management: Test visible focus indicators for interactive elements.

    Test Scenarios

    • Navigating through the menu with a screen reader like NVDA or VoiceOver.
    • Using the Tab and Shift+Tab keys to move forward and backward through menu items.
    • Testing color contrast and font sizes to ensure readability for users with visual impairments.

    Tools and Tips

    • Use Axe Accessibility Checker for automated audits.
    • Test with real users who rely on assistive technologies to uncover practical issues.

    4. Performance Testing

    Why It Matters

    Menus should load quickly and function smoothly, even under high traffic or resource-constrained environments.

    Key Testing Areas

    • Loading Speed: Test how quickly menus appear and respond to interactions.
    • Animation Smoothness: Validate that dropdowns and transitions are fluid.
    • High-Traffic Scenarios: Simulate heavy usage to test resilience.

    Test Scenarios

    • Clicking rapidly between menu items to check for delays or stuttering.
    • Simulating poor network conditions to observe menu behavior during slow loads.
    • Testing on low-performance devices to identify potential bottlenecks.

    Tools and Tips

    • Use Lighthouse to measure menu performance metrics.
    • Conduct load testing with Apache JMeter or similar tools.

    5. Edge Case and Error Handling Testing

    Why It Matters

    Menus must handle unexpected scenarios gracefully to ensure a seamless user experience.

    Key Testing Areas

    • Offline Mode: Test how menus behave when the device is disconnected from the internet.
    • Dynamic Content: Validate menus that fetch data dynamically or adapt based on user roles.
    • Error Messages: Ensure fallback mechanisms are in place for broken links or failed content loads.

    Test Scenarios

    • Testing menus with dynamically generated items (e.g., user-specific settings).
    • Simulating network interruptions to check for appropriate error handling.
    • Interacting with unavailable or restricted menu items to verify error messages.

    Tools and Tips

    • Use Postman to simulate API failures for dynamic menus.
    • Test with different user roles to ensure menus display correctly for each scenario.

    Conclusion

    QA testing for menus is crucial for delivering a functional, accessible, and seamless user experience. By focusing on functional testing, cross-platform compatibility, accessibility, performance, and edge case handling, QA teams can ensure menus meet technical and user expectations. Regular testing and collaboration with designers and developers are essential for refining menus and addressing potential issues proactively.
  • Tab bar – 10. QA testing

    Tab bar – 10. QA testing

    5 Key Considerations for QA Testing Tab Bars

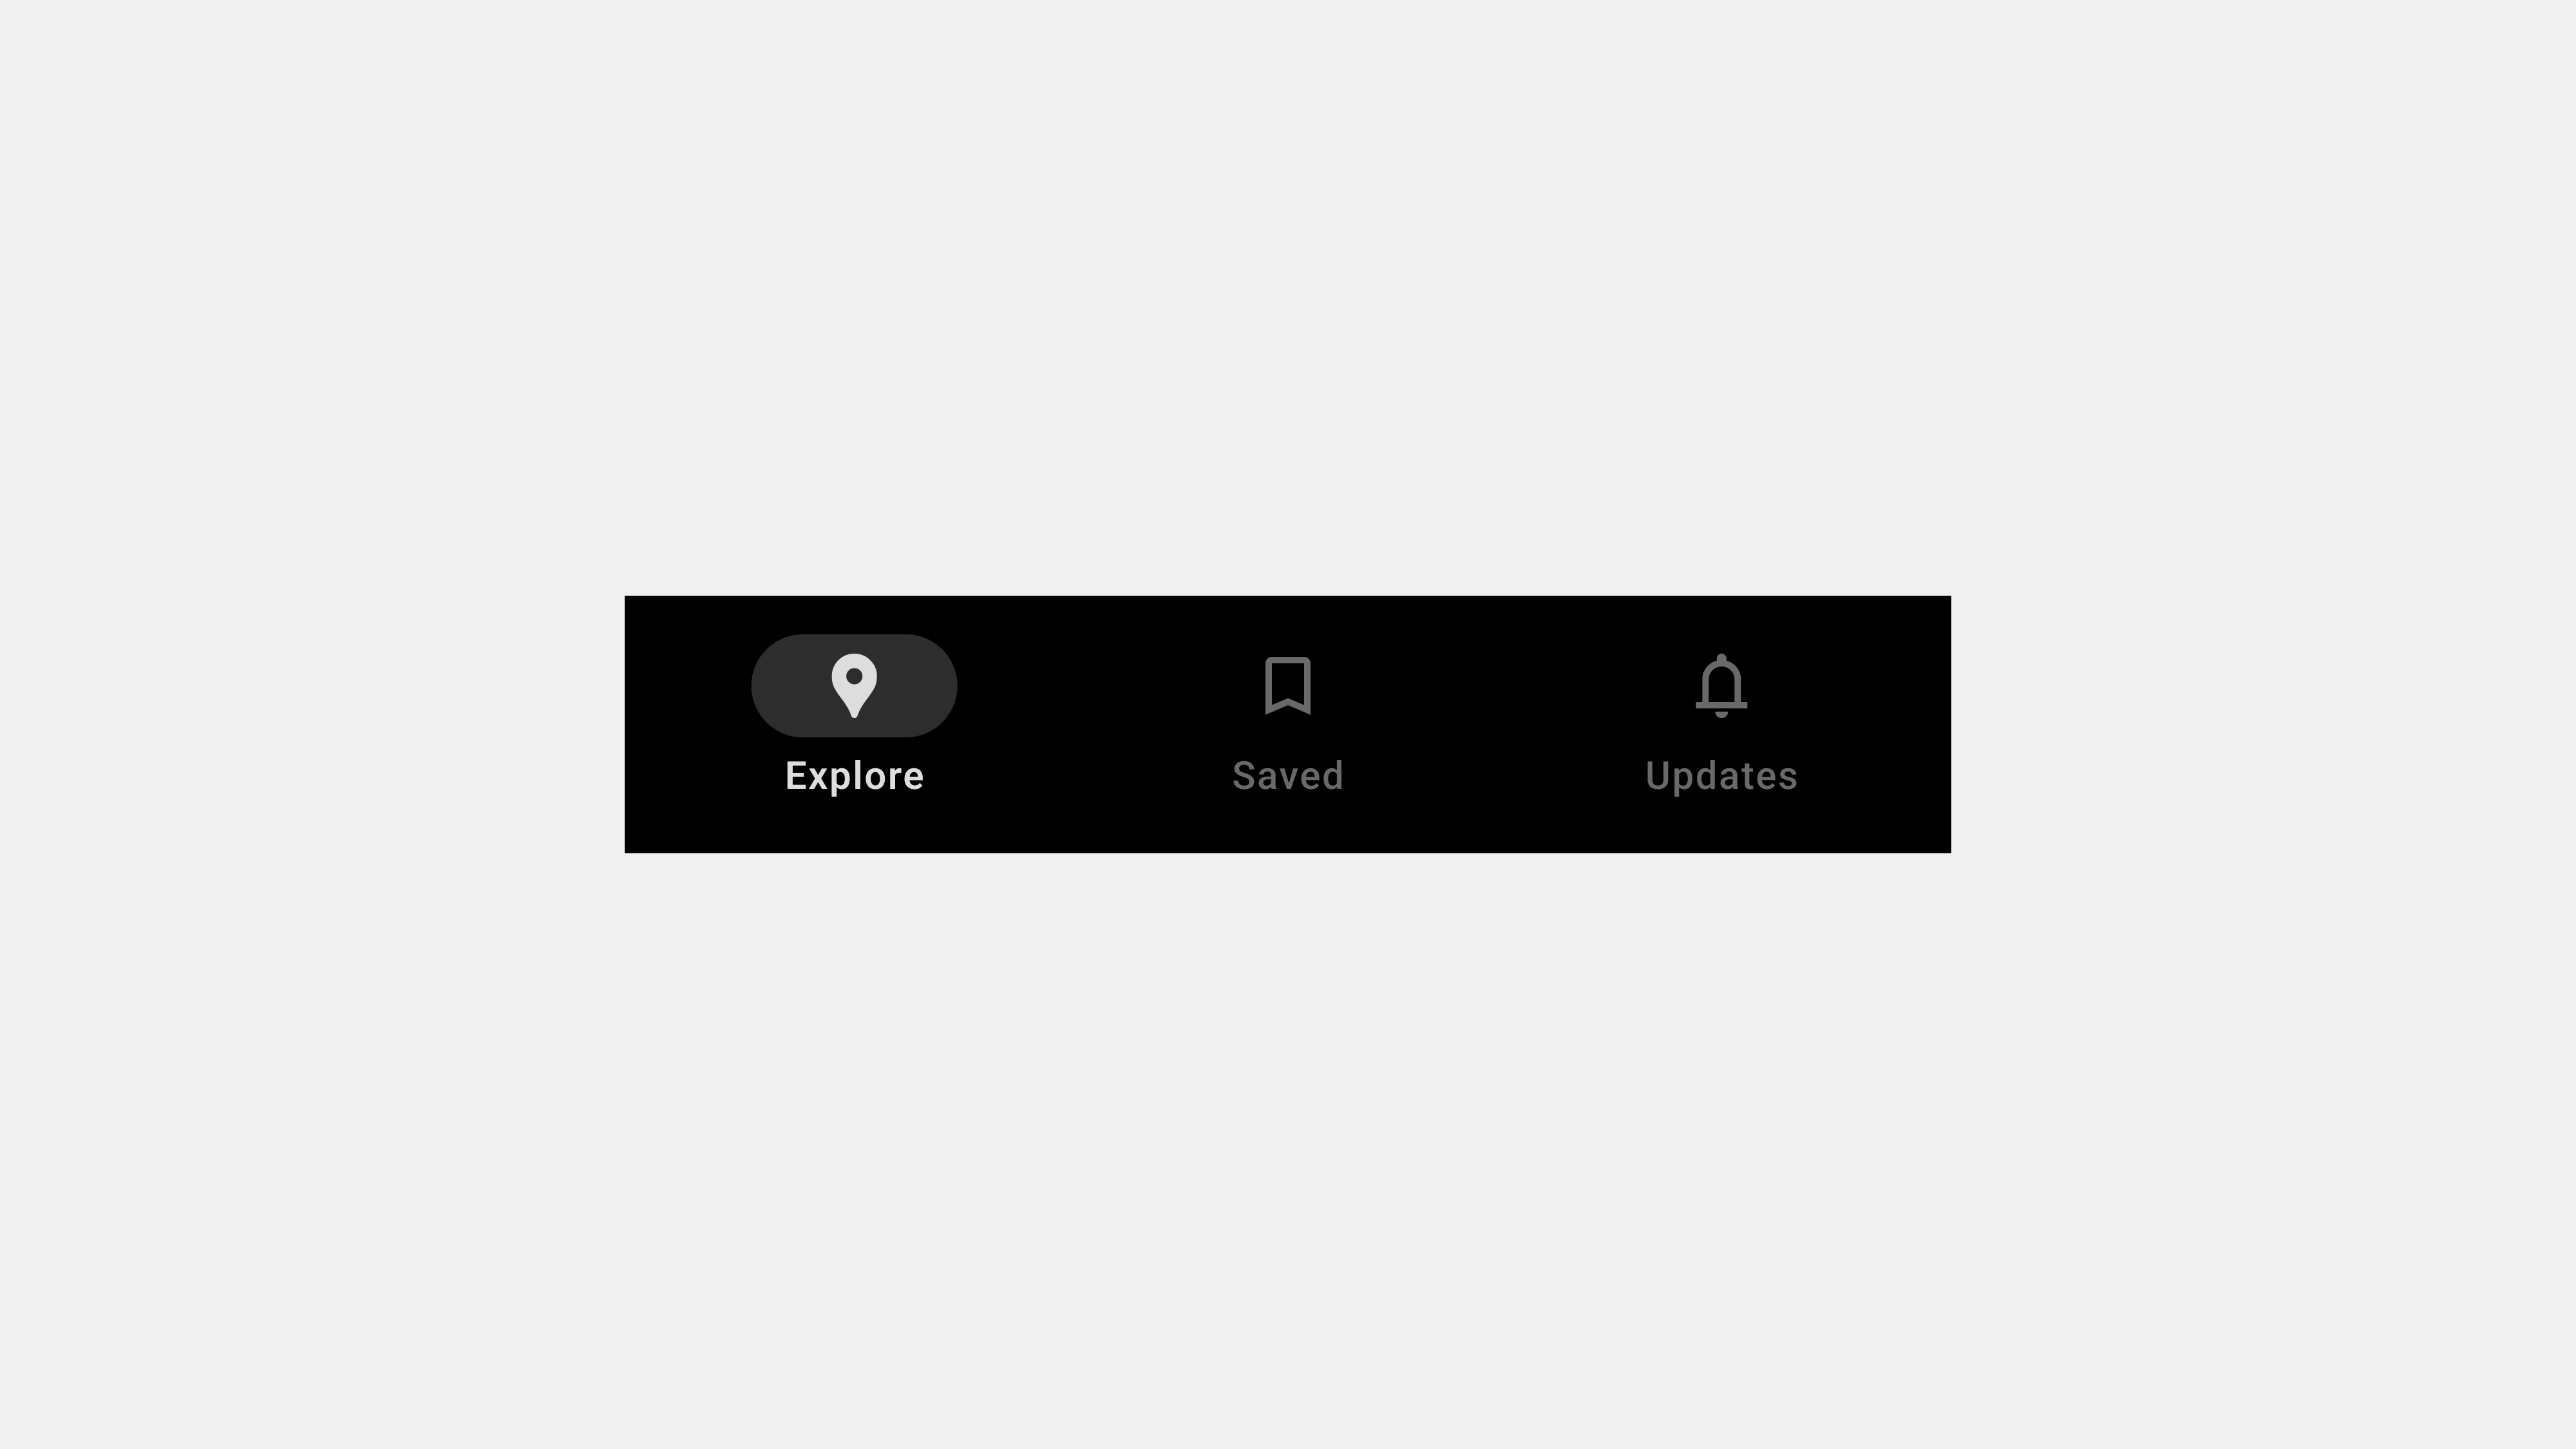
    Tab bars are integral to app navigation, offering users quick and intuitive access to key sections. Ensuring their reliability through rigorous quality assurance (QA) testing is essential to delivering a seamless user experience. This article outlines five critical aspects of QA testing for tab bars, helping teams identify and address potential issues effectively.


    1. Functional Testing

    Why It Matters

    The primary role of a tab bar is to facilitate navigation between an app’s key features. Functional testing ensures that all tabs perform as expected, delivering users to the correct destinations without errors.

    Key Testing Areas

    • Navigation Links: Verify that each tab correctly routes users to the intended screen or section.
    • Interactive Elements: Ensure icons, text, and touch targets are responsive.
    • Dropdowns or Overflow Menus: Test nested or additional options for proper functionality.

    Test Cases

    • Open and close tabs using various input methods (tap, swipe, keyboard).
    • Validate interactions with dynamic tabs, such as those loading user-specific content.
    • Test tabs under edge cases, such as rapid switching or simultaneous user inputs.

    Tools

    • Selenium or Cypress for automated functional tests.
    • Browser DevTools for manual interaction testing.

    2. Cross-Platform Compatibility

    Why It Matters

    Users interact with apps across multiple devices and platforms, including iOS, Android, and web browsers. Ensuring consistent tab bar behavior across these environments enhances usability and trust.

    Key Testing Areas

    • Device-Specific Behavior: Check for consistent performance on phones, tablets, and desktops.
    • Browser Compatibility: Test tab bars in major browsers such as Chrome, Safari, Firefox, and Edge.
    • Platform-Specific Features: Validate that platform-specific adaptations (e.g., gestures on mobile) work as intended.

    Test Cases

    • Verify tab bar responsiveness on different screen sizes and orientations.
    • Test hover effects and focus states in web applications.
    • Ensure gesture-based navigation (e.g., swiping) functions correctly on touch devices.

    Tools

    • BrowserStack or Sauce Labs for cross-platform testing.
    • Real device testing for accurate results on mobile and tablet devices.

    3. Accessibility Compliance

    Why It Matters

    Accessible design ensures that all users, including those with disabilities, can navigate the app effectively. This not only improves user experience but also meets legal accessibility standards.

    Key Testing Areas

    • Screen Reader Compatibility: Ensure that tab labels and states are announced clearly.
    • Keyboard Navigation: Verify that users can navigate and activate tabs using only a keyboard.
    • Focus Management: Confirm that focus indicators are visible and correctly positioned.

    Test Cases

    • Test tab navigation using screen readers like NVDA or VoiceOver.
    • Use the Tab key to move between tabs and check for proper focus indicators.
    • Validate color contrast ratios to ensure readability for visually impaired users.

    Tools

    • Axe Accessibility Checker.
    • Lighthouse Accessibility Audit.

    4. Performance Testing

    Why It Matters

    Performance issues, such as laggy animations or slow loading, can frustrate users and negatively impact their experience. Testing the tab bar’s performance under various conditions ensures smooth operation.

    Key Testing Areas

    • Loading Speed: Measure the time it takes for tabs to respond to user input.
    • Animation Smoothness: Test transitions between tabs for any lag or stutter.
    • Scalability: Verify performance when the tab bar includes dynamic or personalized content.

    Test Cases

    • Simulate high user traffic to check the tab bar’s responsiveness.
    • Test performance on slow networks or offline scenarios.
    • Monitor the impact of animations on low-end devices.

    Tools

    • Lighthouse Performance Audit.
    • Apache JMeter for load and stress testing.

    5. Error Handling and Edge Case Testing

    Why It Matters

    Applications must handle errors gracefully to maintain a positive user experience. Testing how the tab bar reacts to unexpected inputs or failures is critical for robust functionality.

    Key Testing Areas

    • Broken Links: Ensure tabs redirect users to valid destinations, even if content fails to load.
    • Dynamic Content Errors: Test tabs that fetch user-specific or real-time data for proper fallback behavior.
    • Offline Scenarios: Verify that the tab bar remains functional in offline or limited connectivity modes.

    Test Cases

    • Simulate broken links or failed API calls and check for error messages or fallback options.
    • Test tab interactions when the app is offline, ensuring essential features remain accessible.
    • Validate behavior when users rapidly switch between tabs under unstable network conditions.

    Tools

    • Postman for API testing.
    • Chrome DevTools for simulating offline scenarios.

    Conclusion

    Rigorous QA testing ensures that tab bars function reliably across all use cases, platforms, and user scenarios. By focusing on functionality, compatibility, accessibility, performance, and error handling, QA teams can identify and address potential issues before they impact the user experience. A well-tested tab bar enhances navigation, builds user trust, and supports the overall success of the application.


  • Bottom Navigation Bars – 10. QA Testing

    Bottom Navigation Bars – 10. QA Testing

    5 Key Considerations for QA Testing Bottom Navigation Bars

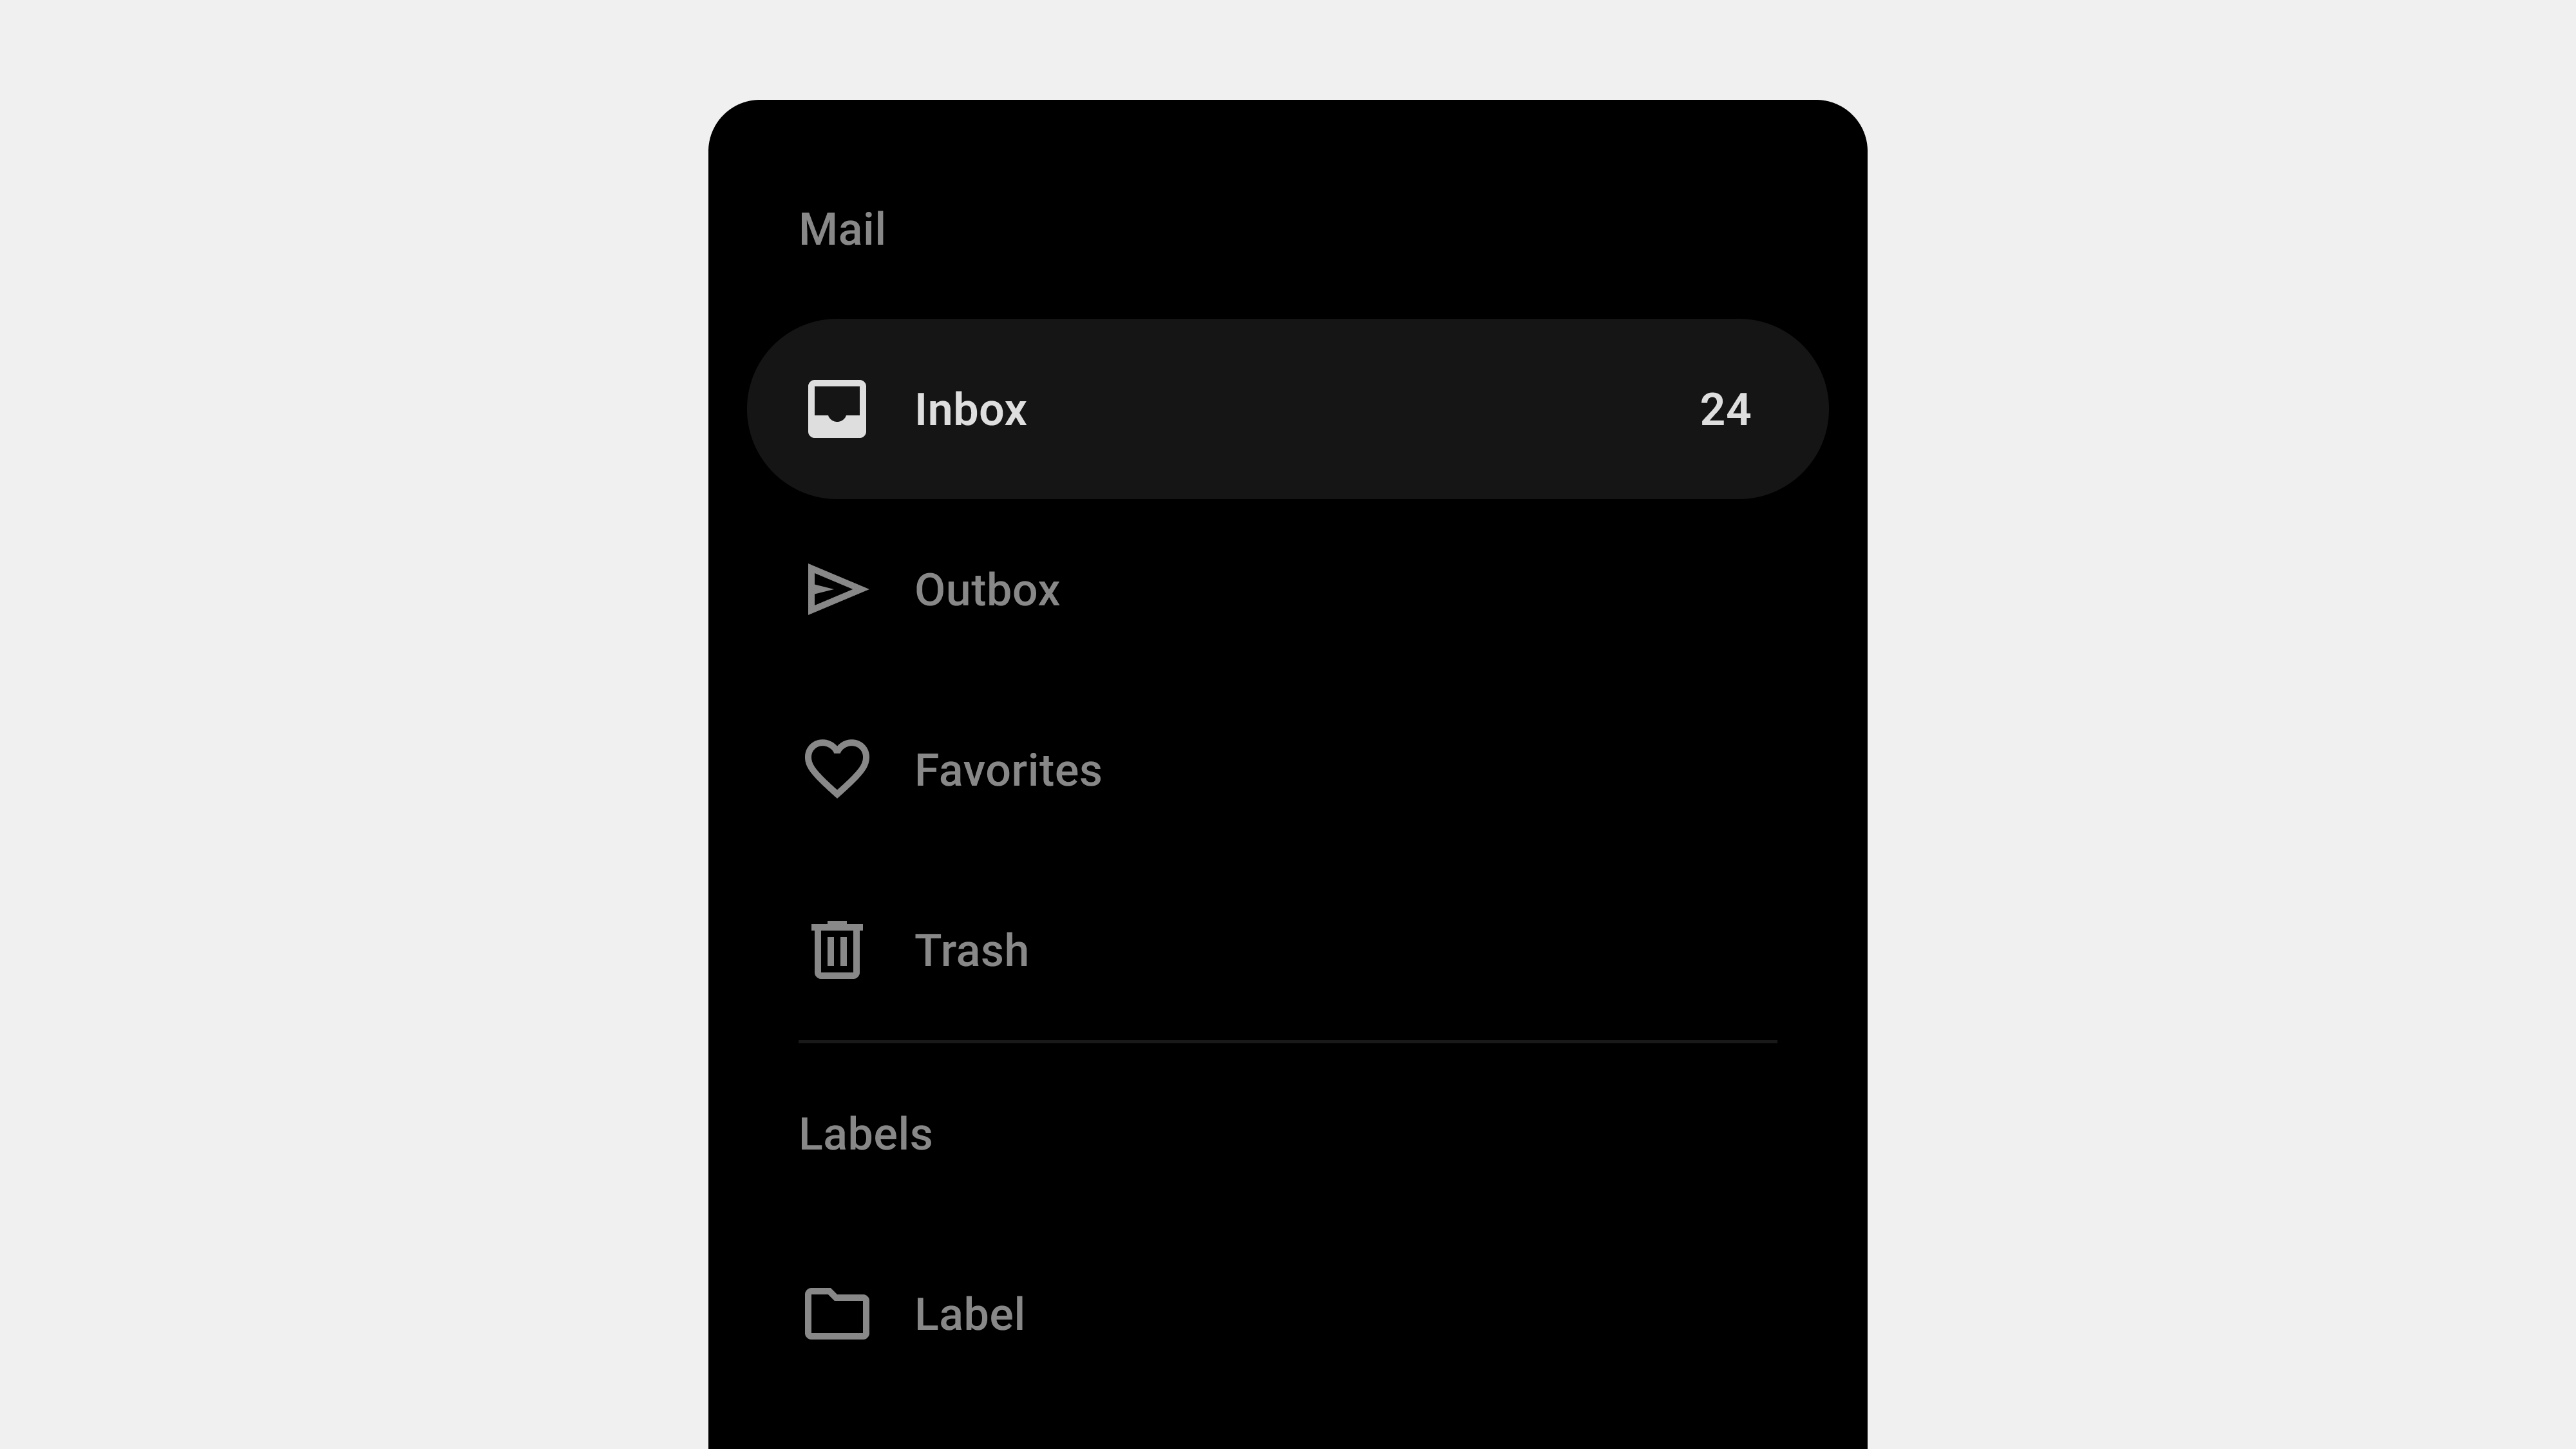
    Bottom navigation bars are critical for providing seamless navigation within applications. QA (Quality Assurance) plays a pivotal role in ensuring these navigation components function correctly, deliver a consistent experience, and meet accessibility standards. This article outlines five key areas to focus on during QA testing of bottom navigation bars, ensuring optimal usability and reliability.


    1. Functional Testing

    Why It Matters

    The core purpose of a bottom navigation bar is to enable smooth navigation between key sections of the app. Ensuring that each tab functions as intended is fundamental to the user experience.

    Key Testing Areas

    • Tab Navigation: Verify that each tab redirects users to the correct screen or section.
    • Interactivity: Ensure that all icons and labels are clickable and responsive.
    • Overflow Menus: Test any additional options provided within dropdowns or overflow menus.

    Test Scenarios

    • Switch between tabs in quick succession to ensure no lag or misrouting occurs.
    • Test tab functionality under edge cases, such as multiple rapid taps or simultaneous user interactions.
    • Validate tab interactions on both touch and non-touch devices.

    Tools

    • Selenium or Cypress for automated functional testing.
    • Manual testing for edge cases and real-world scenarios.

    2. Cross-Platform and Device Compatibility

    Why It Matters

    Apps are accessed across a variety of devices and platforms, including iOS, Android, and web browsers. Ensuring that the bottom navigation bar works consistently across all platforms is crucial for a unified user experience.

    Key Testing Areas

    • Device Responsiveness: Test navigation bar behavior on different screen sizes, from small phones to large tablets.
    • Browser Compatibility: Validate functionality on major browsers, including Chrome, Safari, Firefox, and Edge.
    • Platform-Specific Features: Test platform-specific interactions, such as gestures on mobile devices.

    Test Scenarios

    • Check how the navigation bar adapts to various resolutions and orientations (portrait vs. landscape).
    • Validate the tab behavior in responsive layouts on web platforms.
    • Simulate user interactions on real and emulated devices.

    Tools

    • BrowserStack or Sauce Labs for cross-platform and cross-browser testing.
    • Real device testing for mobile and tablet apps.

    3. Accessibility Testing

    Why It Matters

    An accessible bottom navigation bar ensures inclusivity for users with disabilities, enhancing usability and meeting legal requirements.

    Key Testing Areas

    • Screen Reader Support: Verify that all tabs are labeled and announced correctly by screen readers.
    • Keyboard Navigation: Ensure users can navigate and select tabs using only a keyboard.
    • Focus Management: Test visible focus indicators for interactive elements.

    Test Scenarios

    • Navigate tabs using screen readers like VoiceOver or NVDA and check for proper announcements.
    • Use the Tab key to navigate between tabs and validate focus indicators.
    • Check contrast ratios between text, icons, and backgrounds for compliance with WCAG standards.

    Tools

    • Axe Accessibility Checker for automated audits.
    • Lighthouse Accessibility Audit for scoring accessibility performance.

    4. Performance and Load Testing

    Why It Matters

    A navigation bar that lags or fails under heavy usage can frustrate users and degrade the overall app experience. Performance testing ensures responsiveness and reliability.

    Key Testing Areas

    • Loading Speed: Validate that the navigation bar loads instantly and functions without delays.
    • Animation Smoothness: Check for stutter-free transitions between tabs.
    • High-Traffic Scenarios: Simulate heavy usage or poor network conditions to test resilience.

    Test Scenarios

    • Simulate multiple users accessing the app simultaneously to test performance under load.
    • Evaluate navigation bar behavior in offline or low-bandwidth scenarios.
    • Check the impact of animations on low-end devices.

    Tools

    • Apache JMeter for load testing.
    • Chrome DevTools for analyzing performance metrics.

    5. Error Handling and Edge Case Validation

    Why It Matters

    Applications must handle errors gracefully to ensure a seamless user experience. Testing the navigation bar’s response to unexpected scenarios is vital for robust functionality.

    Key Testing Areas

    • Broken Links: Verify that all tabs redirect users to valid destinations.
    • Dynamic Content Failures: Test tabs that load user-specific or real-time data for proper fallback behavior.
    • Offline Scenarios: Ensure the navigation bar remains functional in offline or limited connectivity conditions.

    Test Scenarios

    • Simulate broken links or API failures to ensure appropriate error messages are displayed.
    • Test tab interactions in offline mode, ensuring basic navigation still functions.
    • Validate how the navigation bar behaves when users rapidly switch tabs during a failed content load.

    Tools

    • Postman for API error simulation.
    • Real device testing for simulating offline and edge-case scenarios.

    Conclusion

    Rigorous QA testing ensures that bottom navigation bars function reliably and enhance the user experience. By focusing on functionality, compatibility, accessibility, performance, and error handling, QA teams can identify and resolve potential issues before they impact users. A well-tested navigation bar not only meets user expectations but also strengthens the app’s overall usability and engagement.


  • Navigation Drawers – 9. QA

    Navigation Drawers – 9. QA

    5 Key Considerations for QA Testing Navigation Drawers

    Navigation drawers are critical components of modern user interfaces, helping users navigate seamlessly through content and features. Given their importance, rigorous quality assurance (QA) testing is essential to ensure functionality, usability, and accessibility. This article outlines the five most important areas to focus on during QA for navigation drawers, providing practical insights and actionable tips for QA teams.


    1. Functional Testing

    Why It Matters

    The primary purpose of a navigation drawer is to enable users to access content and features efficiently. Broken links, unresponsive buttons, or improper animations can lead to user frustration and abandonment.

    Key Considerations

    • Link Validation: Ensure all links navigate to the correct destinations.
    • Interactive Elements: Verify that buttons, icons, and touch gestures work as expected.
    • Dropdowns and Submenus: Test nested menus for smooth opening and closing.

    Testing Checklist

    • Open and close the drawer using gestures, buttons, and keyboard shortcuts.
    • Verify that all menu items are clickable and functional.
    • Test dynamic elements like dropdowns or expandable sections.

    Example

    In a food delivery app, ensure that tapping “My Orders” navigates to the order history page, and submenus like “Past Orders” expand correctly.

    Tools

    • Selenium or Cypress for automated testing.
    • Browser DevTools for manual interaction testing.

    2. Cross-Platform and Cross-Browser Compatibility

    Why It Matters

    Users access navigation drawers on a variety of devices and browsers. Ensuring compatibility across platforms is crucial for a consistent experience.

    Key Considerations

    • Browser Testing: Verify functionality in major browsers like Chrome, Firefox, Safari, and Edge.
    • Device Testing: Test responsiveness on different devices, including mobile, tablet, and desktop.
    • Orientation Changes: Ensure the drawer behaves properly when switching between portrait and landscape modes.

    Testing Checklist

    • Check for consistent rendering across browsers and devices.
    • Test swipe gestures on mobile and click functionality on desktop.
    • Verify that the drawer adapts to screen orientation changes.

    Example

    In a streaming app, ensure the drawer is fully functional when accessed on Chrome (desktop), Safari (iPhone), and Firefox (Android).

    Tools

    • BrowserStack or Sauce Labs for cross-browser testing.
    • Real-device testing for accurate results.

    3. Accessibility Testing

    Why It Matters

    Navigation drawers must be accessible to all users, including those with disabilities. Ignoring accessibility can lead to usability issues and potential legal implications.

    Key Considerations

    • Keyboard Navigation: Test if users can open, close, and navigate the drawer using only a keyboard.
    • Screen Reader Compatibility: Ensure all elements are readable and labeled correctly for screen readers.
    • Focus Management: Verify that focus shifts to the drawer when it opens and returns to the toggle button when it closes.

    Testing Checklist

    • Navigate through the drawer using the Tab and Shift+Tab keys.
    • Test with screen readers like NVDA, VoiceOver, or JAWS.
    • Check focus indicators for visibility and functionality.

    Example

    In a banking app, confirm that pressing Tab moves through each menu item in the correct order and announces labels like “Accounts” and “Transfers.”

    Tools

    • Axe Accessibility Checker.
    • Lighthouse Accessibility Audit.

    4. Performance Testing

    Why It Matters

    Navigation drawers are often used on every page, making their performance critical to the overall user experience. Slow loading or laggy animations can frustrate users and lead to disengagement.

    Key Considerations

    • Load Speed: Measure how quickly the drawer opens and closes.
    • Dynamic Content: Test the performance of dynamically loaded sections.
    • Heavy Traffic: Simulate multiple users interacting with the drawer simultaneously.

    Testing Checklist

    • Measure response times for interactions like opening, closing, and navigating.
    • Test the drawer under slow network conditions.
    • Analyze performance during high traffic or peak usage scenarios.

    Example

    In a retail app, ensure the drawer loads personalized recommendations within 2 seconds, even on slow networks.

    Tools

    • Apache JMeter for load testing.
    • Lighthouse Performance Audit.

    5. Error Handling and Edge Case Testing

    Why It Matters

    Navigation drawers must handle unexpected inputs, errors, or failures gracefully to ensure a robust user experience.

    Key Considerations

    • Broken Links: Verify that the drawer responds appropriately to missing or incorrect links.
    • Dynamic Content Errors: Test how the drawer handles failures when fetching dynamic content.
    • Offline Mode: Ensure the drawer remains functional with offline or limited connectivity.

    Testing Checklist

    • Simulate 404 errors for missing pages linked in the drawer.
    • Test how the drawer behaves when API calls for dynamic content fail.
    • Check for proper error messages or fallback options in offline scenarios.

    Example

    In a project management app, ensure the drawer shows a clear error message if “Project Files” fails to load due to a server issue.

    Tools

    • Postman for API testing.
    • Chrome DevTools for offline simulation.

    Conclusion

    Quality assurance for navigation drawers is a multi-faceted process that involves testing functionality, compatibility, accessibility, performance, and error handling. By addressing these five critical areas, QA teams can ensure that navigation drawers are reliable, user-friendly, and inclusive. A well-tested navigation drawer enhances the overall user experience, building trust and satisfaction among users.


  • Navigation Bars – QA

    Navigation Bars – QA

    5 Key Considerations for QA Testing Navigation Bars

    Quality assurance (QA) plays a critical role in ensuring that a navigation bar functions correctly, provides a seamless user experience, and maintains platform stability. As the navigation bar is one of the most visible and frequently used components of a digital product, meticulous testing is essential. This article highlights the five most important areas to focus on when conducting QA for navigation bars, ensuring they are user-friendly, functional, and error-free.


    1. Functional Testing: Ensuring Core Functionality

    Why It Matters

    The primary purpose of a navigation bar is to help users move through the platform seamlessly. Any broken links, incorrect redirections, or missing elements can disrupt the user experience.

    Key Guidelines

    • Link Validation: Test all navigation links to ensure they point to the correct destinations.
    • Dropdown and Submenu Functionality: Verify that dropdown menus and submenus expand, collapse, and link correctly.
    • Button Clickability: Ensure all buttons in the navigation bar are clickable and trigger the intended actions.

    Checklist for QA

    • Test all links across pages and devices.
    • Verify that hover states, clicks, and taps work as expected.
    • Ensure secondary navigation items (e.g., dropdowns) function correctly.

    Tools

    • Browser DevTools for link inspection.
    • Automated testing tools like Selenium or Cypress for repeated functional tests.

    2. Cross-Browser and Cross-Platform Compatibility

    Why It Matters

    Users access websites and applications on a variety of devices and browsers. Ensuring compatibility prevents issues like misaligned elements, broken functionality, or inconsistent behavior.

    Key Guidelines

    • Test Across Major Browsers: Chrome, Firefox, Safari, Edge, and their mobile counterparts.
    • Device Testing: Check functionality on desktops, tablets, and mobile devices.
    • OS Compatibility: Verify behavior across Windows, macOS, iOS, and Android.

    Checklist for QA

    • Test how the navigation bar adapts to different screen sizes.
    • Ensure consistent appearance and functionality in both light and dark modes (if supported).
    • Confirm responsive behavior (e.g., hamburger menus on mobile).

    Tools

    • BrowserStack or Sauce Labs for multi-browser and multi-device testing.
    • Real-device testing for accurate results.

    3. Accessibility Testing: Inclusive Usability for All Users

    Why It Matters

    An accessible navigation bar ensures that users with disabilities can interact with your platform effectively. Accessibility issues can alienate users and may even lead to legal consequences.

    Key Guidelines

    • Screen Reader Compatibility: Ensure ARIA roles, labels, and semantic HTML elements are properly implemented.
    • Keyboard Navigation: Test navigation using only a keyboard (e.g., tab and arrow keys).
    • Focus Indicators: Verify that focus states are visible and intuitive.
    • Color Contrast: Ensure adequate contrast for text and interactive elements.

    Checklist for QA

    • Test with screen readers like NVDA or VoiceOver.
    • Verify the tab order of navigation links.
    • Use contrast-checking tools to ensure WCAG compliance.

    Tools

    • Lighthouse for accessibility audits.
    • Axe Accessibility Checker for in-depth reports.

    4. Performance and Load Testing

    Why It Matters

    The navigation bar is a core component of every page, so its performance affects the overall user experience. Slow load times or unresponsive interactions can frustrate users.

    Key Guidelines

    • Load Speed: Ensure the navigation bar loads quickly on all devices.
    • Dynamic Content: Test how dynamically loaded menus (e.g., dropdowns) perform under various conditions.
    • Heavy Traffic: Simulate high traffic to ensure stability during peak usage.

    Checklist for QA

    • Measure page load times with the navigation bar active.
    • Test dynamic elements like dropdowns under slow network conditions.
    • Simulate multiple users accessing the navigation bar simultaneously.

    Tools

    • Lighthouse or GTmetrix for load speed analysis.
    • Apache JMeter for load and stress testing.

    5. Edge Cases and Error Handling

    Why It Matters

    Navigation bars must handle unexpected inputs, errors, or unusual user behaviors gracefully. Poor error handling can lead to crashes or broken navigation, which can negatively impact the user experience.

    Key Guidelines

    • 404 Errors: Verify how the navigation bar behaves when a linked page is missing or unavailable.
    • Dynamic Menu Failures: Test what happens if dynamically loaded content fails to load.
    • Broken Links: Simulate incorrect or outdated links to ensure error messages are helpful.

    Checklist for QA

    • Ensure fallback behavior for missing or unavailable content.
    • Verify error messages are displayed clearly and guide users on what to do next.
    • Test navigation elements in offline mode or with intermittent network connectivity.

    Tools

    • Postman for API testing in dynamic menus.
    • Chrome DevTools for offline simulation.

    Conclusion

    Quality assurance for navigation bars involves testing for functionality, compatibility, accessibility, performance, and error handling. By focusing on these five areas, QA teams can ensure that navigation systems meet user expectations, perform reliably, and provide an inclusive experience across all platforms. A well-tested navigation bar not only enhances usability but also strengthens the overall credibility of the product.